Do you know web development gets efficient and more easygoing through the local environment? The local setup renders a flexible development environment for developers to experiment with new ideas.
They can manage their project code on this platform. Now the matter is which cross-platform web server they should use to test their web applications on a local host web server. We will discuss this in detail in the following sections of the article.
So, let us dig deeper into our main topic of configuring a Virtual host on XAMPP and see how web developers run their website on the local host.
Here, we are using the XAMPP local server for local hosting.
XAMPP is a free, open-source, cross-platform web server stack (Apache, MySQL & PHP) package that can help developers run their web pages on the World Wide Web. XAMPP stack provides a local platform where web developers for testing websites and clients before publishing them to the main server.
Using the XAMPP stack, developers can experience the same components as the main web server. Further, without any hassle, they can switch the database(s) and whole website(s) to the main server when it is time to take the project live.
For instance, we will consider the WordPress websites and configure them on the XAMPP server running on Windows 10.
What is a Virtual host?
The meaning of virtual hosts is accessing or hosting multiple domain names on a single server. It signifies various websites share the same server and utilities for the respective project. These servers are differentiated by their hostname. Visitors can route to the website by hostname or IP address to the correct virtual host.
Three different virtual hosts, namely name, IP, and port-based hosting - can serve this purpose.
- The name-based hosting ensures developers can host multiple websites on the same server IP.
- The IP-based hosting ensures each website uses a unique IP address.
- Port-Based hosting ensures different websites host on a standard IP address but differentiates based on the unique port number.
In this article, I am creating a virtual host in my local environment to run my website with the host name “http://demo.local”.
To run any website on XAMPP the default URL “http://localhost/<foldername>/”
Create Virtual Host
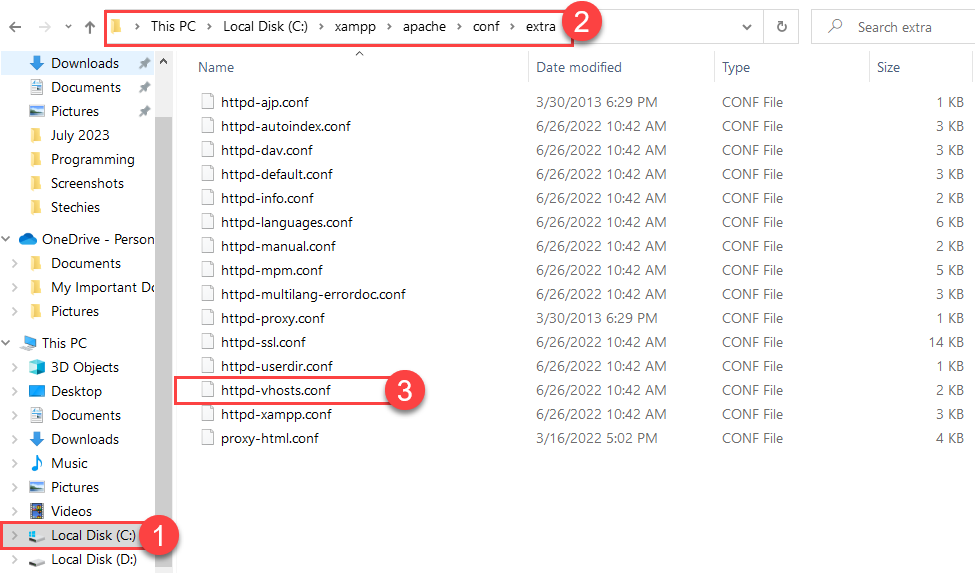
Step 1: Open your file explorer; go to the "C:\XAMPP\apache\conf\extra" directory or whatever location the XAMPP file exists.
C:\XAMPP\apache\conf\extra
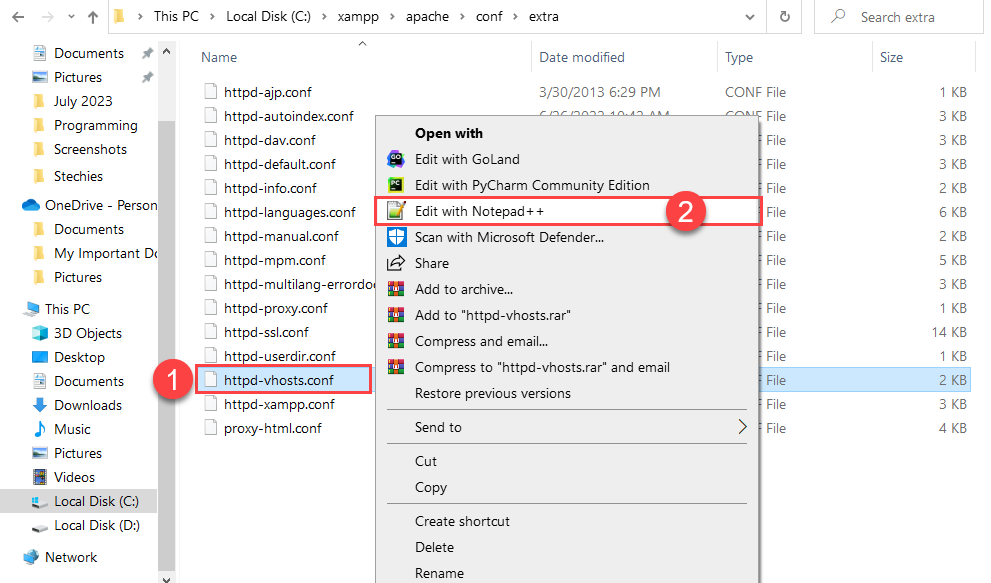
Step 2: Editing the httpd-vhosts.conf with any text editor, such as Notepad++ or Notepad
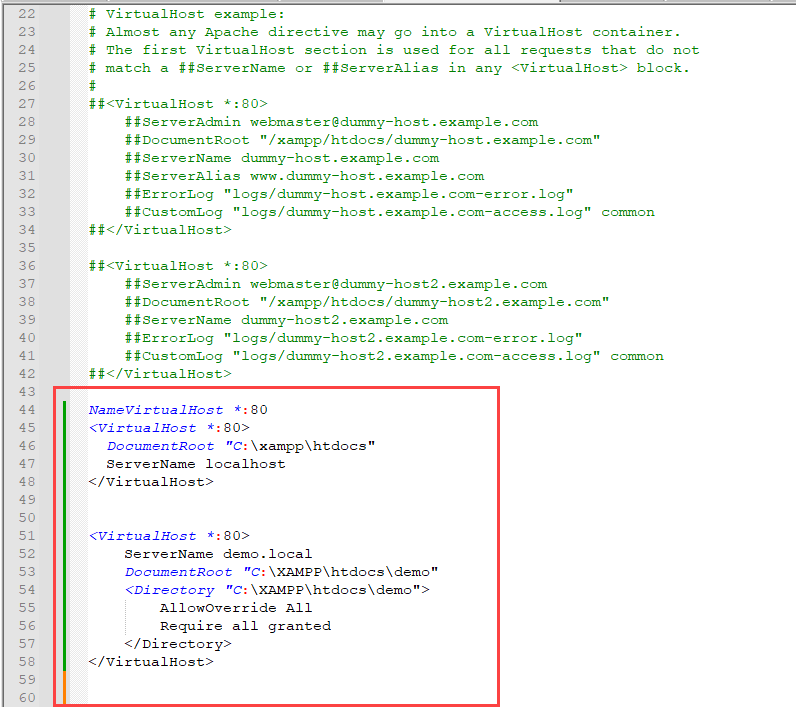
Step 3: It will show something like this:

Step 4: Paste the new local host entry at the bottom of the text or code:
<VirtualHost *:80>
    ServerName demo.local
    DocumentRoot "C:\XAMPP\htdocs\demo"
    <Directory "C:\XAMPP\htdocs\demo">
        AllowOverride All
        Require all granted
    </Directory>
</VirtualHost>
Replace demo.local with the chosen domain name for the virtual host. Then change the path name C:\XAMPP\htdocs\demo with the path to the root directory of the desired website. In the advice lines of code:
- VirtualHost: By default, most web servers use port 80. Nevertheless, one can change the port to 8080, 8081, etc.
- DocumentRoot: indicates the folder where files of the site will exist. In the above code, we used the folder name "demo."
- ServerName: is the URL for the desired virtual host.
- Directory: implies the directory of the virtual host.
Step 5: Set the default XAMPP Directory
Add these line of code on top of httpd-vhosts.conf file
NameVirtualHost *:80
<VirtualHost *:80>
DocumentRoot "C:\xampp\htdocs"
ServerName localhost
</VirtualHost>
httpd-vhosts.conf file
Step 6: Developers can proceed by saving the changes to the httpd-vhosts.conf file and close it.
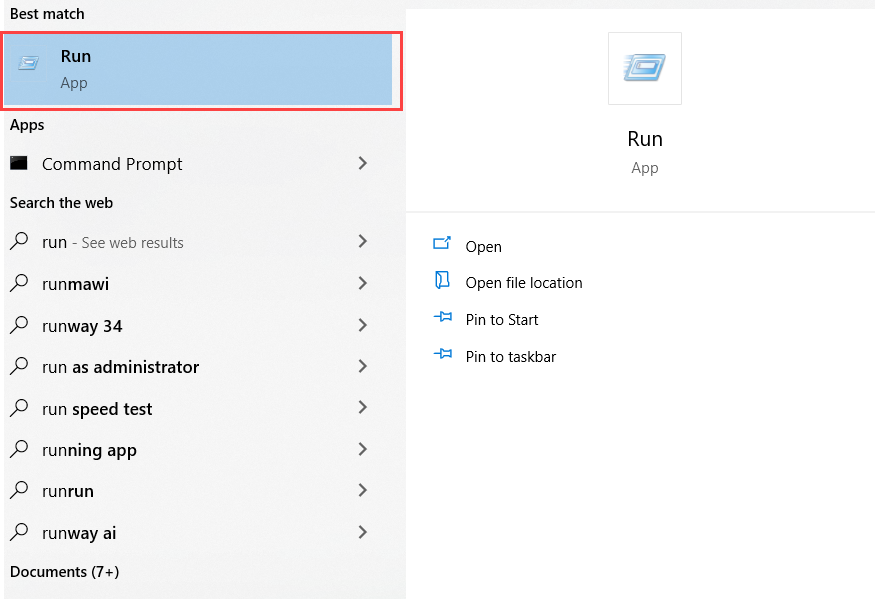
Step 7: Open Windows, Search "Run," and open the application.
Step 8: Copy and paste the following lines in the "Open" section and press OK.
C:\Windows\System32\drivers\etc\hots
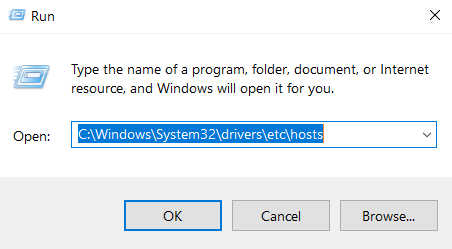
Step 9: It will open the Host file in the desired text editor. Here, developers need to add a new entry to the end of the file, mapping the domain name of the desired virtual host to the local IP address:
127.0.0.1 demo.local
Step 10: Save this change to store the information.
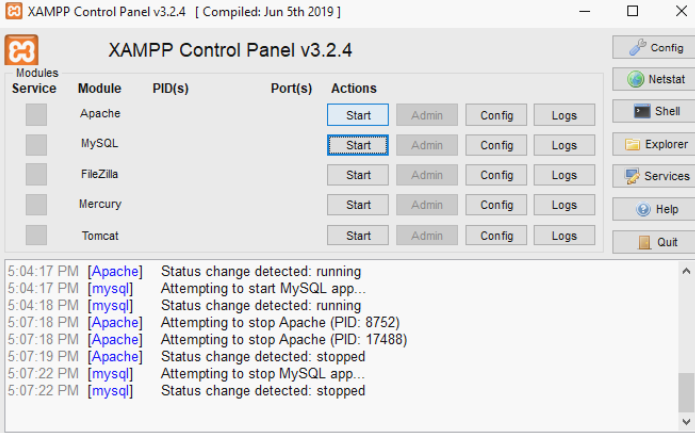
Step 11: Once the process is complete, developers should restart Apache and MySQL from the XAMPP control panel. It will allow them to check whether http://demo.local opens up in their browser.

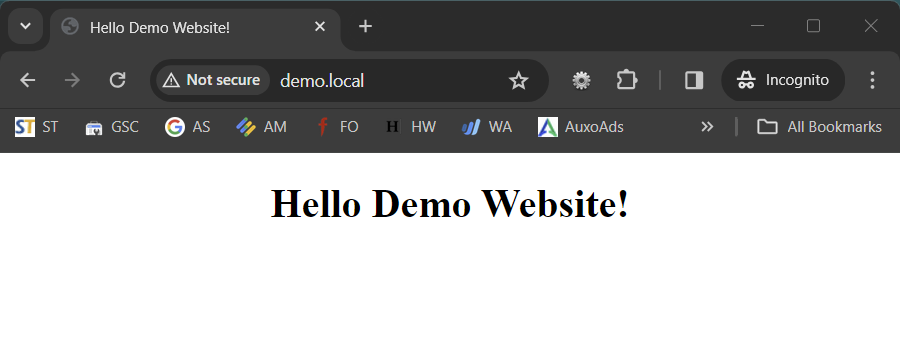
Open your Browser and open your configured website using the given URL
http://demo.local
This will open your website in the browser
Change the WordPress Site URL to your virtual host URL "http://demo.loc"
Here, we will see how to configure the WordPress site on XAMPP.
Step 1: One of the most critical steps for configuring the virtual host in WordPress is to change the "site URL" in the Database.
Step 2: Open the browser, type "http://localhost/phpmyadmin/," to Open "PHPMyAdmin" and choose the desired database. Here, we used our database name"demo"
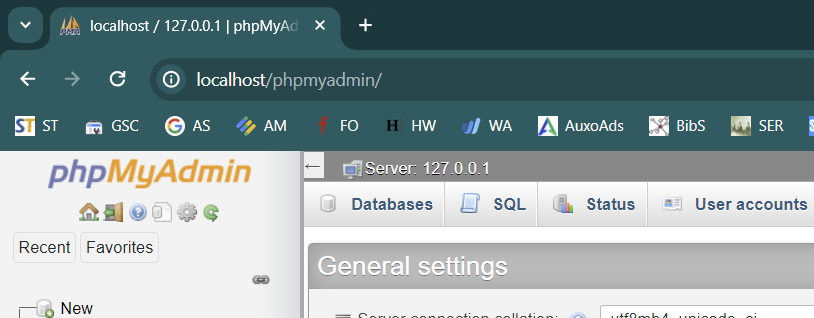
Step 3: Go to wp_options and click edit the site and home URL from "http://localhost/demo/" to whatever name you gave while hosting, such as "http://demo.local."

Step 4: Check whether you have successfully set up the domain by restarting the Apache server and visiting the desired virtual host URL. We used the "http://demo.local" as the virtual host URL.
Setp5: Change your site URL in WordPress website using the SQL command
UPDATE wp_options SET option_value = replace(option_value, 'http://oldurl.com', 'http://newurl.com') WHERE option_name = 'home' OR option_name = 'siteurl';
UPDATE ld_posts SET guid = replace(guid, 'http://oldurl.com','http://newurl.com');
UPDATE ld_posts SET post_content = replace(post_content, 'http://oldurl.com', 'http://newurl.com');
UPDATE ld_postmeta SET meta_value = replace(meta_value,'http://oldurl.com','http://newurl.com');
These commands will change all "old URL" to "new URL" in your WordPress Website
Conclusion
We hope this article has cited all the steps for creating and configuring a virtual host on the XAMPP server. These will cater to clear ideas on how they set up their virtual host running on Windows, XAMPP, and virtual hosts to the web developers exploring testing their website locally before launching on the main server.